
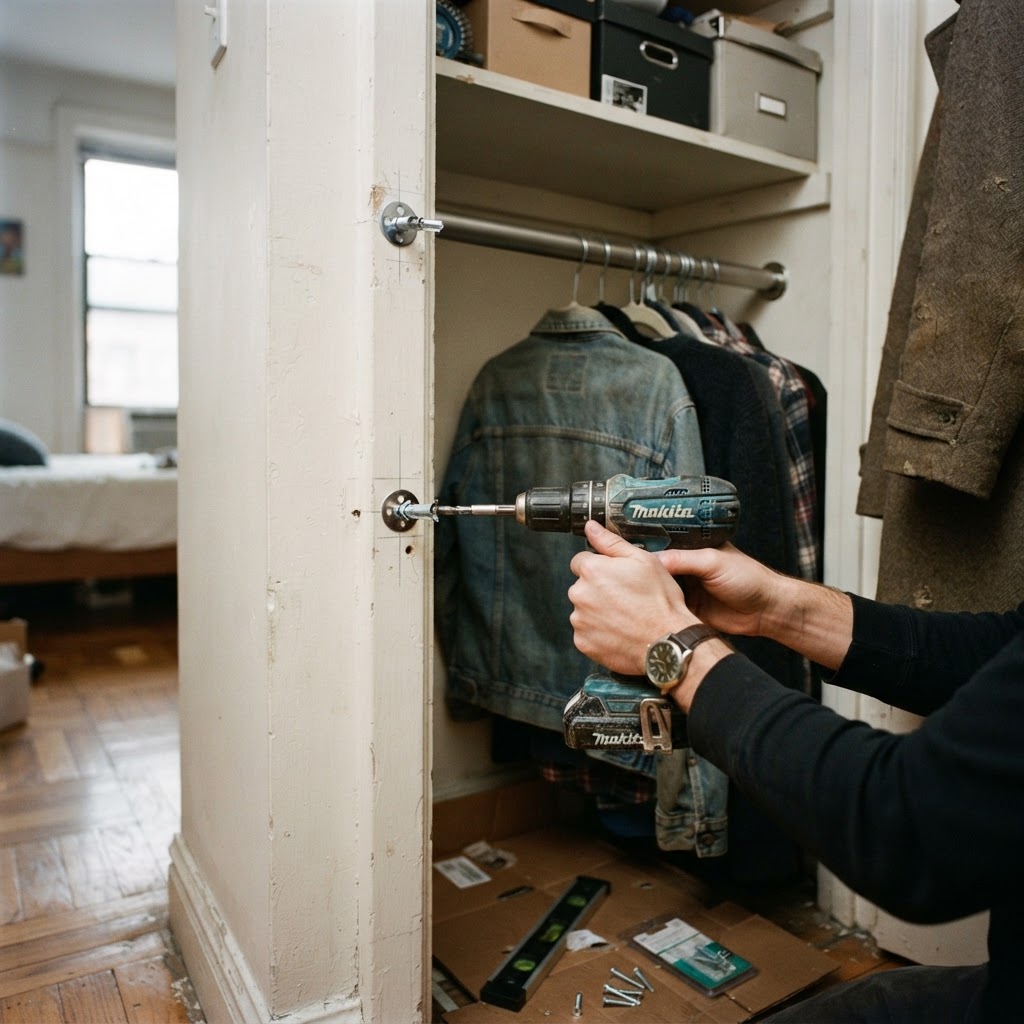
Installing a closet rod where there is no stud is a common challenge for New Yorkers living in older brownstones or pre-war apartments. In buildings where walls are made of lath and plaster or hollow drywall, finding a solid wood stud can feel impossible. If you hang a rod directly into plaster, it will eventually rip out under the weight of your winter coats. The secret is using heavy-duty toggle bolts or molly bolts that expand behind the wall to distribute weight across a larger surface area rather than relying on a single screw. Planning your layout with precision is essential for a permanent fix in a small city apartment.
Assess the Wall and Weight Load
Before you start drilling into your wall, you must determine what is behind the surface. In many NYC walk-ups, walls are a combination of wood lath strips and a thick layer of plaster. A standard screw will not hold. If you are dealing with hollow drywall, you need an anchor that can handle shear force. For heavy clothing, never rely on plastic anchors you find in basic hardware kits. They are rarely sufficient for the concentrated weight of a packed rod.
Start by tapping on the wall to locate hollow spots versus solid wood. A stud finder is often unreliable in old plaster walls because the lath density triggers false positives. Instead, use a small nail to test the area. If you hit resistance, you have found a stud or a horizontal blocking piece. If the nail pushes through easily, you are dealing with a hollow cavity. If you find that your closet setup requires a complex configuration or if you are mounting a shelf above the rod, it is often safer to book a handyman to ensure the hardware is load-rated. For simpler jobs, you can proceed with high-strength toggle bolts.
Proper Installation Techniques
Using Toggle Bolts
Toggle bolts are the most reliable method for hollow walls. Unlike standard screws, these have spring-loaded wings that fold through a drilled hole and snap open on the inside of the wall. To install, mark your drill points carefully using a level to ensure the rod is perfectly horizontal. Use a drill bit that matches the size specified on the toggle bolt package, usually around half an inch. Once the hole is drilled, insert the bolt through your rod bracket, attach the toggle wing, and push it through the wall. As you tighten the bolt, the toggle pulls tight against the back of the plaster or drywall, creating a rock-solid anchor point. Avoid overtightening, which can crush brittle plaster surfaces.
Reinforcement Strategies
If you are worried about the wall crumbling, consider mounting a wooden backer board first. Use several toggle bolts to secure a one-by-four piece of lumber across the width of the closet. Make sure the board is at least two feet long to span across two potential stud locations or to distribute weight across a wider section of wall. Once that board is firmly attached to the wall, you can mount your closet rod brackets directly to the wood using standard wood screws. This method is much more stable and prevents the localized wall damage that occurs when you mount brackets directly into weak spots. If the process feels overwhelming, remember that you can book furniture assembly if your rod came as part of a larger unit.
Navigating NYC Building Regulations
In New York City, your lease or building management may have specific rules regarding how you attach items to walls. Always check your building handbook before drilling multiple holes into plaster, as older buildings often have strict policies on damage to historical features. Some co-ops require you to patch and paint holes professionally when you move out. If you are a tenant, keep all original hardware and be prepared to spackle and touch up the paint upon move-out. Always confirm if your management company requires a certificate of insurance for any contractor you hire to perform work in your unit.
Maintenance and Long-term Stability
Once the rod is installed, maintenance is simple but vital. Check the tension of your toggle bolts every six months, especially after a seasonal closet clean-out when you might be shifting heavy winter gear. If you notice the bracket pulling away from the wall, do not ignore it. A slight gap indicates that the wall material is failing under pressure. If you see this, remove the rod immediately and consider adding a larger backer board or moving the rod to a different height where the plaster is more intact. Proper maintenance prevents the rod from pulling down a large chunk of plaster, which would be a far more expensive repair than a simple bolt adjustment.
When to Call in the Pros
There is a point where DIY risks damaging your property, especially in rental units with strict co-op or condo management rules. If your walls are crumbling plaster that turns to dust as soon as you drill, or if you need to install heavy-duty hardware that requires specific clearance behind the wall, it is time to stop. Improperly installed rods can cause significant wall damage that is difficult to patch.
Professional pros can also help if you are setting up other elements of your home. If you are struggling with larger organizational projects, we can book TV mounting or assist with book tech setup to get your space functional. Attempting complex installations on your own can lead to costly repairs if things go wrong, whereas a professional ensures the work is done right the first time.
Frequently Asked Questions
Can I use plastic anchors for a closet rod?
Plastic anchors are generally not strong enough for a closet rod. The weight of your clothing creates a pulling force that will pull the plastic out of the wall over time. Always use metal toggle bolts for high-weight, high-traffic installations.
How many toggle bolts do I need for a rod?
Use at least two toggle bolts per bracket. If the rod is long and requires a center support bracket, that center point should also be secured with toggle bolts to prevent sagging in the middle of your closet.
Will I damage my plaster walls during installation?
Plaster is brittle and prone to cracking. Always use a sharp drill bit and apply slow, steady pressure without using a hammer drill setting. If the plaster starts to crack, stop immediately and use a larger washer to cover the area.
Book help in New York
If you prefer to have an expert handle your installation to ensure it stays secure for years to come, we are ready to assist. You can book a handyman to take the stress out of your home improvement projects.